I used a copic multi-liner pen to draw string onto the balloon. The word time was stamped using an alpha set from Lawn Fawn.
Showing posts with label card. Show all posts
Party Time
Monday, February 1, 2016
Hi all! This card was really fun to make, but had lots of steps. I first had to decipher where the underneath part of the word "party" would be. Then, using the Lots of Dots stamp set, I stamped a bunch of little circles to look like confetti. On the top layer, after die cutting the word party, I stamped the balloons and confetti. I then added dimensional adhesive and topped the card with the white cardstock that has the word "party" cut out of it.
Friday, January 29, 2016
When I saw this stamp set I knew I had to have it. It's so versatile and can be used for any occasion. Plus, there are so many options the possibilities are endless. I wanted to keep the card really natural looking so I used a background stamp and white embossed woodgrain.
I watercolored the plants using distress markers. I heat embossed my sentiment on vellum using black embossing powder. I like how some of the plants are in the pot and another is behind it. I think it give dimension to the focal point.
SUPPLIES USED:
Wednesday, January 20, 2016
I just love the light airy feel of this card! I used the Pink Paislee Colorwashed 6x6 paper pad and paired it with a transparency to make the area surrounding the main image see through.
.Header { text-align: center; } .entry-content:after { content: url(.Header { text-align: center; } .entry-content:after { content: url(http://i1359.photobucket.com/albums/q795/SkillsDepot/1c5220cf-87bd-4004-8081-b684a52774e5_zps0f715499.png); centre left: 50px; } ); centre left: 50px; }
The sentiment on the inside is hidden when the card is closed. You can get a better view of this below.
I colored the cupcake in using copics markers and added Wink of Stella clear glitter and Glossy Accents to the cherry. I considered using sequins, but decided it needed a little more black to balance out the stamped sentiment, so I stamped a few scattered stars.
Thank you for stopping by!
SUPPLIES USED:
Copics
.Header { text-align: center; } .entry-content:after { content: url(.Header { text-align: center; } .entry-content:after { content: url(http://i1359.photobucket.com/albums/q795/SkillsDepot/1c5220cf-87bd-4004-8081-b684a52774e5_zps0f715499.png); centre left: 50px; } ); centre left: 50px; }
Sunday, January 17, 2016
Good morning folks! I needed to have a few thank you cards on hand for both male and female co-workers and I thought this adorable stamp set from Paper Smooches fit the bill. The first thing I did was make a circle mask to create that intergalactic focal point in the middle. I used distress inks in Chipped Sapphire, Evergreen Bough, and Dusty Concord. Then, I dripped water on it and sprinkled Mister Huey in Navy and White.
Then, the gratifying moment comes when you peel off the mask and uncover this really cool effect. I colored the little guy and planets with Copics. I added some Glossy Accents to the planet and the guys face shield.
This card is simple, but oh so cute. It won't be the last card you see using this set. Hope you enjoyed!
SUPPLIES USED:
Distress inks (names above)
Copics
Glossy Accents
Thursday, January 14, 2016
This card was a quickie. I wanted the main image to stand out so I used both a white base and a white background. Then, in an ode to Ms. Kristina Werner I did a little ink blending behind the image using Tumbled Glass distress ink. I colored the image using Copics and adhered everything flat.
I added a little Glossy accents to the beak and the heart and stamped my sentiment. I love how fresh and airy it turned out!
SUPPLIES USED:
Friday, January 8, 2016
Today, I simply water colored using distress markers. No embellishments, sparkle, or bling just simple water coloring and boy do I think this card is just the cutest!
I gave each element a wash coat of the lightest color, then after that dried, I added the darkest colors where shadow would be. I used a clear block to scribble color down and used a blender pen to pick p that color and add it to the picture.
I then took my Evergreen Bough distress inks and stamped some stars in the sky. This entire card was made with just one stamp set and distress markers. I encourage you to try this simple one layer card.
SUPPLIES USED:
Tuesday, January 5, 2016
Lately, I've been ink blending like crazy! One of the easiest ways to pump out cards is to have a few different stencils and ink blend three or four backgrounds at a time. Then, pick an image to die cut and place on top. In this case, I chose these candles from PTI and used silver glitter paper that I colored with a Y38 Copic marker to make an orange hue.
I die cut the birthday sentiment five times and layered them together to get it really dimensional. I wanted to mimic the polka dotted background so I used gems from Hero Arts to added the same circle effect.
This card would be perfect for a child's birthday and it was so much fun to make. See you soon.
SUPPLIES USED:
1 comments
⋅
Labels:
birthday,
card,
die cutting,
glitter,
ink blending,
PTI,
simonsaysstamp,
stencil
Saturday, January 2, 2016
So, I finally had the time to upload a process video! If you want to see how I made the card below and what products were used, you can check it out here or you can go directly to my youtube channel by hitting the YT logo to the right of this post. There is nothing I don't adore about this card. It's bright, cheerful, and makes a statement.
.Header { text-align: center; } .entry-content:after { content: url(.Header { text-align: center; } .entry-content:after { content: url(http://i1359.photobucket.com/albums/q795/SkillsDepot/1c5220cf-87bd-4004-8081-b684a52774e5_zps0f715499.png); centre left: 50px; } ); centre left: 50px; }
Friday, January 1, 2016
Hi everyone! Today, I felt like making a card, but needed a little inspirational "push." Sometimes when I am in a rut, I'll refer to my Pinterest board that has different color combos on it. If you are interested in following me on Pinterest or any of my crafty boards, you can click on the icon to the right of this post.
I used a lot of MFT stamps products on this card. I first die cut and stamped out my ice cream cone. I used a baby wipe to clear some of the color off of the center of the ice cream to add that little highlight. I love the bright yellow polka dot background on the dark teal cardstock. It really makes it pop!
I added Wink of Stella in clear all over the top of the ice cream to make it sparkle. I felt like the card needed some additional sparkly elsewhere to balance it out, so I die cut the tag that the ice cream sits on in silver glitter paper. I added some off kilter vellum over it to die down the brightness. As a finishing touch, I put glossy accents over the cherry.
I added a few Hero Arts bling to add some dimension and the card was done! Hope you enjoyed.
SUPPLIES USED:
Saturday, May 10, 2014
Hi Everyone! It's been a while since I've posted on my blog, but once I saw the challenge that Lawnscaping was having I knew I wanted to join. This challenge, we are being asked to create our own background using stamps. Here is the link to the challenge.
It is my grandmother's 96th birthday on the 12th, so I decided to make her a card. I wanted it to have a vintage aged look. I chose to use the "Check it Out" stamp set to make my background.
I stamped the library card using different colors of brown ink and then took my distress inks and stained the back to look like old paper.
It is my grandmother's 96th birthday on the 12th, so I decided to make her a card. I wanted it to have a vintage aged look. I chose to use the "Check it Out" stamp set to make my background.
I stamped the library card using different colors of brown ink and then took my distress inks and stained the back to look like old paper.
I wanted one card to be my main focal point, so I used Milo's alphabet to stamp her name. Then, I used sentiments and numbers from the stamp set to write my greeting and her DOB.
Inside, I kept it real simple to give me plenty of room to write.
I enjoyed playing along! --Nicole
Sunday, March 16, 2014
Hi Everyone! I hope you took time to participate in last week's rainbow challenge. This week, we have another great challenge using the prompt "mint chocolate." I took this opportunity to make a birthday card that would be perfect for either a man or woman.
I used MFT cardstock in Spearmint and Chocolate Fudge. I thought the colors matched the challenge perfectly. I created balloons using an MFT die and twine from Target. I felt the card needed another color incorporated without taking away from the main focus. I thought the gold sparkle achieved that added interest.
I inked the edges of the balloons with mint julep ink to give them some dimension. I love the way this one turned out! Be sure to go over to sugarandspicechallenge.blogspot.com. You can see what the other girls created as well.
---Nicole
Sunday, March 2, 2014
Hi Everyone,
My lovely friend Sherri had the brilliant idea to start a challenge blog. It called Sugar and Spice Crafty Challenge. Click here to link to it if you'd like to play along. Our first challenge was to use rainbows as an inspiration. Here are some of the inspiring pics she provided.
I went for a clean and simple approach. Here is what I came up with. I used my MFT rainbow die and PTI clouds on a white on white background to really make the rainbow pop!
I added dimensional adhesive to the clouds and used to different sizes of cloud dies to add some variety.
On the inside, I left a lot of white space and stamped my sentiment in three different tones of orange in the corner.
I encourage you guys to give the challenge a try and check out Sherri's new blog! --Nicole
Saturday, December 7, 2013
Hi Everyone! Happy Saturday. It has been a looonnnnggg work week, so I was happy to get some time in my scraproom this morning. The Lawn Fawn CHA challenge is still happening until the 9th, so I decided to squeeze in another card. My all time favorite stamp set from Lawn Fawn is Quinn's ABC's. It just stamps so nicely and I love the font. I decided to use it as a background stamp to the get well card seen here.
I first cut out a circle using masking paper and placed it in the center of the 5.5x5.5" card. Then, I drew diagonal lines and stamped different words associated with having a cold or the flu. I used 3 inks from MFT stamps.
I think this card turned out so cute and is perfect for any family member or friend that is feeling under the weather. Thanks for stopping by! --Nicole
I first cut out a circle using masking paper and placed it in the center of the 5.5x5.5" card. Then, I drew diagonal lines and stamped different words associated with having a cold or the flu. I used 3 inks from MFT stamps.
Next, I peeled off the mask and stamped my tissue box in the center of the card and colored it with some copics. I used to sentiment stamps and curved them to follow the line of the circle in the center of the card.
I think this card turned out so cute and is perfect for any family member or friend that is feeling under the weather. Thanks for stopping by! --Nicole
Sunday, December 1, 2013
Hi Guys! I have a card to share with you today. I joined in the fun over at MFT for Get Sketchy Wednesday. Here is the sketch we were asked to work with.
I stuck to the sketch fairly closely and used some new papers I have from Lawn Fawn. I colored in my a la mode girl using copics and paper pieced her ornament and bows.
Then, I finished off the inside of the card with a sentiment, leaving plenty of room to write a message.
Thanks for stopping by --Nicole
Saturday, November 30, 2013
Howdy ya'll! One of my absolute favorite critters sets from lawn fawn is On the Farm. When my daughter was first learning her animals, I made her flash cards using these cute guys. I decided to break it out again for fun.
I started by using a mask to stack the haystacks one on top of the other. Then, I stamped the birds and cow. Once all were stamped, I masked them and the clouds and used peacock feathers and weathered wood distress ink to make this beautiful sky!
I colored in all of the critters and placed them on dimensionals. I took my time coloring in the hay because I wanted it to look like little pieces of hay composed each stack. Finally, I took green cardstock, scissors, and mowed lawn distress ink and made these patches of grass.
I stamped the sentiments and hand drew speech bubbles around them. This card is perfect to send in the mail to a girlfriend you haven't caught up with in a long time. It's got a cute message and is bright and cheerful! ---Nicole
Let it Snow
Hi everyone! I was in the mood to make a Christmas card and wanted to achieve some dimension while still only making it one layer. I went for a vintage feel as well.
The first step in achieving this was to start with some cream cardstock and stamp out the large "Let it Snow" sentiment. I then stamped out the same sentiment on masking paper and fussy cut each letter out and used them to mask off the sentiment in on the card. This allowed me to stamp the scene around and on top of the sentiment.
I stamped only the stops of the trees and used a copic marker to make the trunk brown.
The first step in achieving this was to start with some cream cardstock and stamp out the large "Let it Snow" sentiment. I then stamped out the same sentiment on masking paper and fussy cut each letter out and used them to mask off the sentiment in on the card. This allowed me to stamp the scene around and on top of the sentiment.
I stamped only the stops of the trees and used a copic marker to make the trunk brown.
The hill that the trees sit on is actually from the string stamp in the Let it Snow Lawn Fawn stamp set. Then, I stamped different snowflakes and used some distress ink in antique linen to age the card.
Finally, I added the two smaller Let it Snow sentiments to make the sentiment read just like the song. I peeled off the masking and voila! I just love this card.
Thanks for stopping by --Nicole
Friday, November 29, 2013
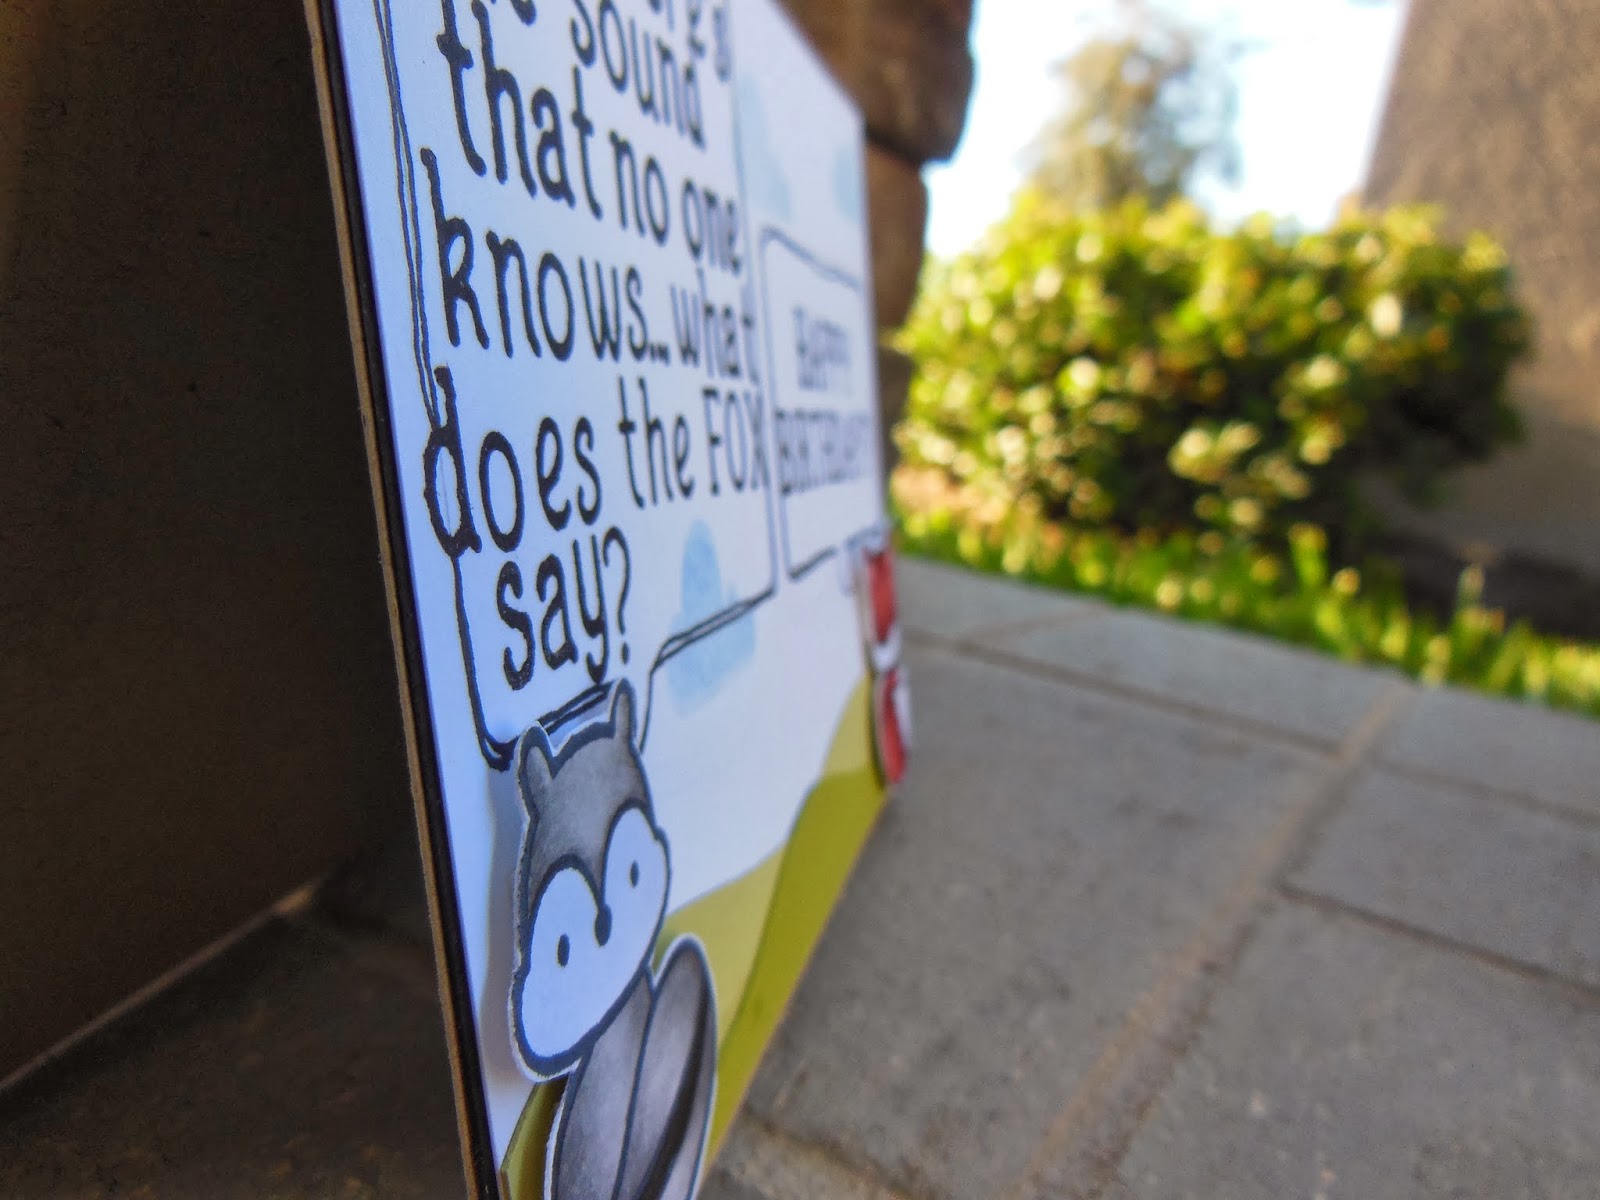
Hi Everyone! I have another card to share with you using an Claire's alphabet set by lawn fawn. I have a friend that is OBSESSED with the viral video What the fox say. I've linked it for you if you've never heard of it.
I thought it would be cute to use the Into the Woods set animals and have one ask the main question in the song and then have the fox respond with a birthday sentiment. I think it turned out adorable.
I colored these cute little animals using my copic markers and free hand cut out the little hills using some cardstock. After stamping the words, I drew some speech bubbles around it to make it look as though they were having a conversation.
I popped the animals up on dimensional adhesive to give them some depth and that's all their was to it! --Nicole
Subscribe to:
Posts (Atom)